


In This Article Show
Anti-rattle clips, often overlooked components of your brake system, play an essential role in maintaining the efficiency of your vehicle’s braking mechanism. These small but significant, parts help to keep your brake pads in place, reduce brake noise, and even extend the life of your brakes.
Installing anti-rattle clips on brake pads may seem daunting if you’re unfamiliar with it. However, with my guidance, you will not only understand the importance of these clips but also how to install them yourself, saving you time and potential repair costs.
This guide aims to demystify the process, providing you with a step-by-step walkthrough to help you confidently complete the task.
The art of installing anti-rattle clips is a skill I’ve honed over my 15 years in the automotive industry, and I am excited to share this knowledge with you. So, whether you’re a seasoned mechanic looking to improve your skills or a beginner hoping to save on repair costs, this guide is for you.
Tools and Materials Needed for Installing Anti-Rattle Clips
Before we get deep into the installation process, gathering all the necessary tools and materials is essential. Proper preparation is a key aspect of any mechanical work, and it’s no different when installing anti-rattle clips.
Here is a list of what you’ll need:
1. Anti-Rattle Clips


These are the star of the show. Make sure they are compatible with your vehicle’s make and model. You can usually find this information in your vehicle’s manual or from the retailer.
2. Brake Pads


If you’re installing new clips, it’s often a good idea to install new brake pads simultaneously, especially if the old ones are worn out.
3. Brake Pad Grease


Also known as brake lubricant, this grease is crucial for preventing brake squealing and sticking. It helps the brake system parts move smoothly.
4. Brake Cleaner


This cleaner will help you remove dust, grease, and debris from the brake assembly, providing a clean work area for the clip installation.
5. Wrench Set

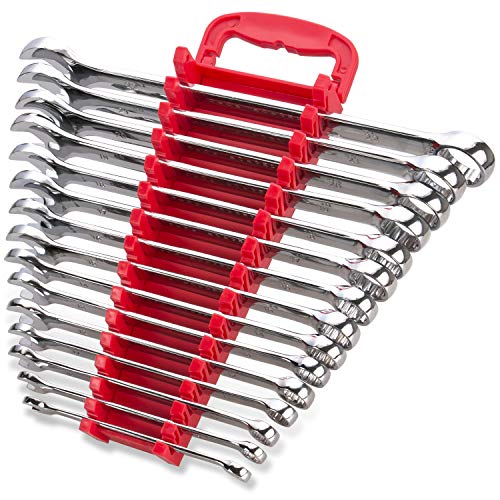
A set of wrenches will come in handy for removing and tightening bolts during the process.
6. C-Clamp


When installing new brake pads, you will need a C-clamp to push the piston back into the brake caliper.
7. Wire Brush

A wire brush is useful for cleaning rust and debris from the brake caliper and other brake parts.
8. Gloves
Always ensure safety. A pair of mechanic gloves will protect your hands from dirt and potential cuts.
9. Safety Glasses
Again, safety first. Glasses will protect your eyes from dust and debris during the process.
Understanding Your Brake System
Before getting your hands dirty, it’s important to understand the brake system and the role that anti-rattle clips play.
The brake system is made up of several crucial components that work together to slow down or stop your vehicle. These components include the brake pedal, master cylinder, brake lines and hoses, brake calipers, brake pads, and anti-rattle clips.
Here’s a brief overview of each:
- Brake Pedal: This is where the braking process starts. When you press the pedal, it activates the master cylinder.
- Master Cylinder: The master cylinder converts the pressure from the brake pedal into hydraulic pressure.
- Brake Lines and Hoses: These carry the brake fluid from the master cylinder to the brake calipers.
- Brake Calipers: The calipers apply pressure to the brake pads, causing them to press against the brake rotors, which slows down or stops the vehicle.
- Brake Pads: These are the parts that press against the brake rotors to slow down or stop the vehicle.
- Anti-Rattle Clips: Anti-rattle clips keep the brake pads secure within the caliper assembly, reducing vibration and noise. They’re small but vital in ensuring your brakes work efficiently and quietly.
Understanding the function of each component will help you install the anti-rattle clips and diagnose any potential issues that may arise with your brakes in the future.
Step-by-Step Guide on How to Install Anti-Rattle Clips on Brake Pads
Now that we’ve covered the tools you need and the brake system’s basic components, let’s move on to the main event. Here is a detailed, step-by-step guide on installing anti-rattle clips on your brake pads.
1. Removing the Old Brake Pads
First, loosen the bolts holding the caliper in place and carefully remove the caliper. Once it’s off, you should be able to see the brake pads. Remove the old brake pads from the caliper bracket.
2. Preparing for the New Brake Pads
Clean the caliper bracket using a wire brush to remove any rust or debris. Once clean, apply a small amount of brake pad grease to the areas where the brake pads will sit. This helps to ensure a smooth fit and reduces noise.
3. Positioning the Anti-Rattle Clips
Now, it’s time for the anti-rattle clips. These clips should be positioned on the caliper bracket where the ends of the brake pads will rest. Ensure the clips are positioned correctly; they should fit snugly and not move around.
4. Installing the New Brake Pads
Insert the new brake pads into the caliper bracket, making sure they are resting on the anti-rattle clips. Ensure they are securely in place.
5. Checking the Installation
Reattach the caliper and tighten the bolts. Make sure everything looks correct and secure. Give the brake pedal a few pushes to check the pressure – it should feel firm.
Please keep in mind, if at any point you feel unsure, it’s always better to consult with a professional. Proper installation of brake components is crucial for your vehicle’s safety.
Common Mistakes to Avoid When Installing Anti-Rattle Clips
Even with the best instructions and intentions, mistakes can happen, especially when you’re new to a task. But don’t worry. As someone who’s seen it all in over 15 years of working as a mechanic, I can guide you through some of the most common pitfalls and how to avoid them.
Here are some mistakes you should watch out for when installing anti-rattle clips on brake pads:
1. Improper Positioning of the Anti-Rattle Clips
This is one of the most common mistakes. Remember, the anti-rattle clips need to fit snugly on the caliper bracket. They can’t do their job effectively if they’re loose or not positioned correctly. Always double-check their positioning before you install the new brake pads.
2. Skipping the Cleaning Step
It might seem unnecessary, especially if your brake components look clean, but skipping the cleaning step can lead to problems. Rust and debris can cause the brake pads and clips to fit improperly, leading to inefficiencies in the brake system.
3. Not Applying Brake Pad Grease
The brake pad grease helps the brake pads move smoothly and reduces noise. It’s a small step, but a critical one. Don’t forget to apply it before installing the new brake pads.
4. Over-tightening the Caliper Bolts
When you’re reattaching the caliper, tightening the bolts as much as possible can be tempting, but this can lead to problems. Over-tightening can cause damage to the bolts or other brake components. Always tighten to the manufacturer’s recommended torque.
5. Neglecting to Check Your Work
After you’ve installed the clips and new brake pads, it’s crucial to check your work. Ensure the brake pads are secure and the brake pedal feels firm when pressuring it.
By being aware of these common mistakes and taking steps to avoid them, you’ll be well on your way to a successful anti-rattle clip installation.
Frequently Asked Questions about Anti-Rattle Clips
Over Here are some of the most common questions and their answers. This should help clear up any lingering doubts or confusion about the process.
Do I always need to replace the anti-rattle clips when changing brake pads?
While it’s not always necessary, replacing the anti-rattle clips when you change your brake pads is generally a good practice. Over time, these clips can wear out or get damaged, so replacing them can ensure your brake system operates efficiently and quietly.Are all anti-rattle clips the same?While it’s not always necessary, replacing the anti-rattle clips when you change your brake pads is generally a good practice. Over time, these clips can wear out or get damaged, so replacing them can ensure your brake system operates efficiently and quietly.
Can I drive my car if the anti-rattle clip is broken or missing?
If an anti-rattle clip is broken or missing, your vehicle can still operate, but driving it in this condition is not advisable. The absence of these clips can cause excessive noise, premature brake pad wear, and even potential damage to the caliper bracket.
Can anti-rattle clips cause squeaking?
Ironically, yes. While one of the main purposes of anti-rattle clips is to reduce noise, if installed incorrectly or worn out, they can cause a squeaking or rattling noise.
Are all anti-rattle clips the same?
No, anti-rattle clips are not universally interchangeable. The design and size of these clips can vary based on the make and model of your vehicle. Always make sure you’re using clips that are compatible with your vehicle.
Wrapping it up
In this guide, we’ve discussed the role of anti-rattle clips in your brake system and walked through a detailed, step-by-step process of installing them on your brake pads.
We’ve covered the tools and materials you’ll need, common mistakes to avoid, and answered some frequently asked questions.
Remember, anti-rattle clips might be small components, but their impact on your brake system’s performance is significant. Installing them correctly reduces brake noise, prevents premature wear of your brake pads, and enhances your vehicle’s safety.